I took a two day cabinet making class at Woodcraft , a woodworking tools/materials store about 20 mins away. The main reason is that I want to learn more about joining wood together, other than just using screws. I also want to build a Little Free Library and maybe a dresser for my spare room. It seems that a cabinet, a drawer, a dresser are all basically the same thing, a box.
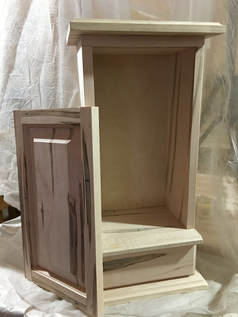
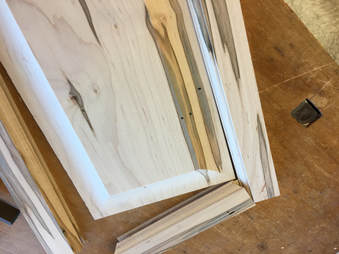
We are only making a small cabinet, 11”x 7”x 22”. But there are just as many steps to make this, just smaller dimensions. And there are many steps. We are working with rough cut Ambrosia Maple, about 8” wide and ¾” thick. Our instructor, Dave, had 2 chunks of wood set out for us. One for the decorative top/bottom, the other for the carcass (box). First, we worked the decorative top/bottom to get it cut and out of the way. Step 1 was to plane it to ¾”. Then joint one edge (make it flat/straight/even). We ripped this to 7 ¼” on the table saw, then jointed that sawn edge to make it nice (get rid of any possible saw marks or burn marks). Then we used a mitre saw to cross cut this to 2 pieces 10 ⅞” . Remember that this is rough cut lumber, so no edge is 90o , first you have to use the mitre saw to cut off a little bit at one end to get that end 90o. Then you can measure from there for the proper lengths. We set these aside for later. Now we took our other board and cut it into 5 smaller pieces, all a little longer than the measurements needed (remember : rough cut, nothing is 90o, so we will cut it to finish length). These will be the sides, top, bottom, and a shelf for our box/carcass. Sides will be 20”, top/bottom 9 ⅜” , shelf 8 ⅝” (remember to cut a little longer, ~1”). Joint one edge flat, rip to width (sides/top/bottom 5 ¾”, shelf 5 ¼”) , joint side 2, crosscut one edge to make 90o , cross cut finished lengths. 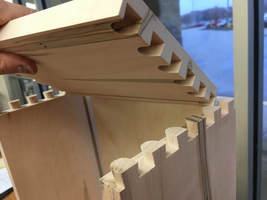
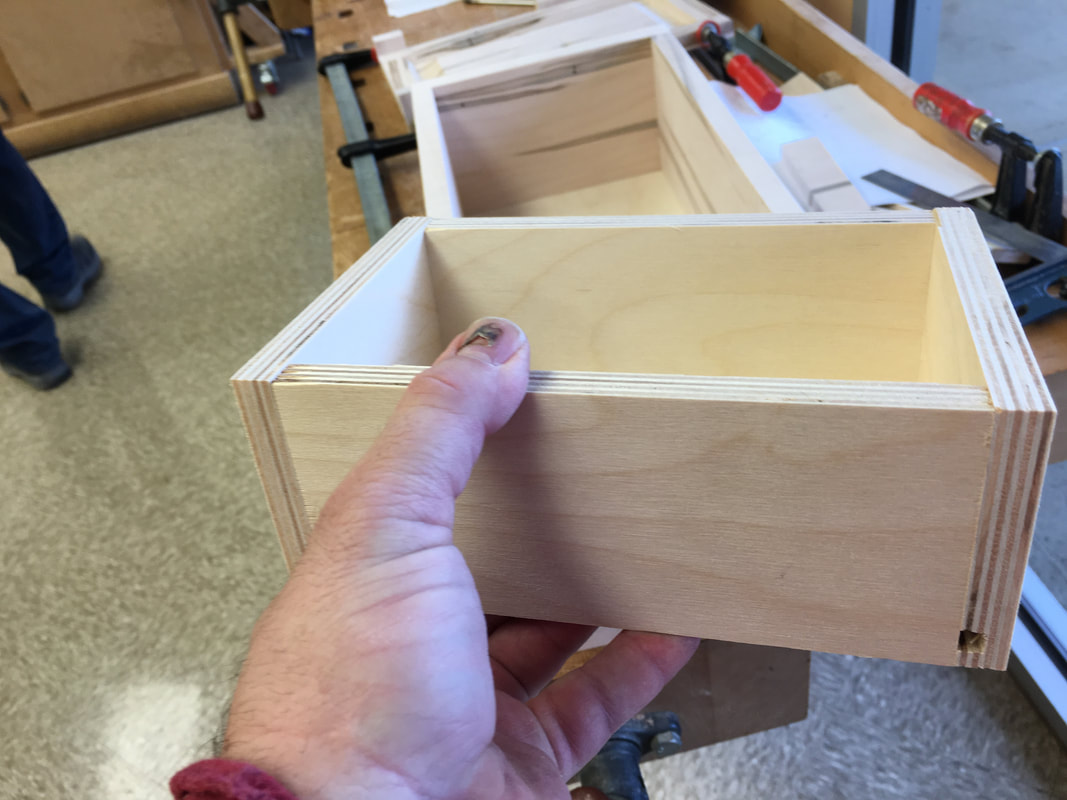
The next step is the actual joinery. We are using half blind dovetail for this box. This requires a jig and a router (and a dovetail bit and a bushing that rides on the jig : some jigs come complete with these). Half blind means the joint is only seen from one side, not both. One joint is cut at a time, ie. one end of 2 boards are done at the same time, for example the left side of the top and the top of the left side. One board goes on the front of the jig, the other on the top. The jig has an alignment tool that offsets one of the boards so the joint lines up. You adjust the depth of the router cut to make the joint tighter or looser. Also, if it is a little tight, you can always sand a little bit. The jig is a template/outline/track that you run the router on (follow the path). Some people like to run the router through twice to ensure a smooth cut, but as you do this more often you will get better at it. There are various slopes/angles that you can cut the dovetail at, depending on the type of wood, done by buying different router bits.
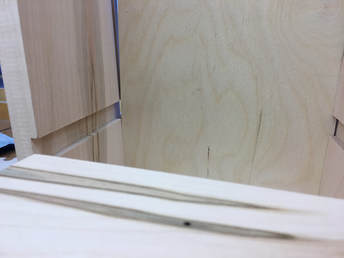
Our next step was to cut some slots ( dado ) for the back panel and the shelf. A dado blade set is put on the table saw and has multiple blades for various widths of cut, but also creates a flat bottom in the cut. We cut a ¼” wide ¼” deep dado in the sides/top/bottom for the back panel and a ¾” wide ¼” deep for the shelf in the sides. For the back panel, we tried to go through the center of a pin/tail of the dovetail so there wouldn’t be a tiny piece of wood that might break off. Speaking of back panel, we were given a small panel to cut to size. Measuring the opening of our box (we have not glued it together , but we have dry fit it) we need to cut the panel just a little bigger than the opening. The two slots are each ¼” deep, so if we add just less than ½”to our width and length (say ⅜”), it should fit in the slot. You can cut both the width and length on the table saw, this might be a smoother cut that the mitre saw.
Now for a bunch of little steps. Cut the shelf to size, fitting flush to the front edge of the box (we are adding a trim piece on front of this). Remember the slots are ¼” deep , so add ⅜” to the width of the opening. Glue the carcass together by putting glue in the pockets and clamp the box together to dry. Cut a scrap piece of wood for the shelf trim , 1 ½” x about 9 ⅜” (the width of your box). Cut another piece for the false front of the drawer, 3 ¾” x about 9 ⅜” . Cut these two to be flush side to side of your box. 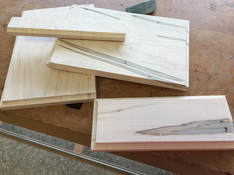
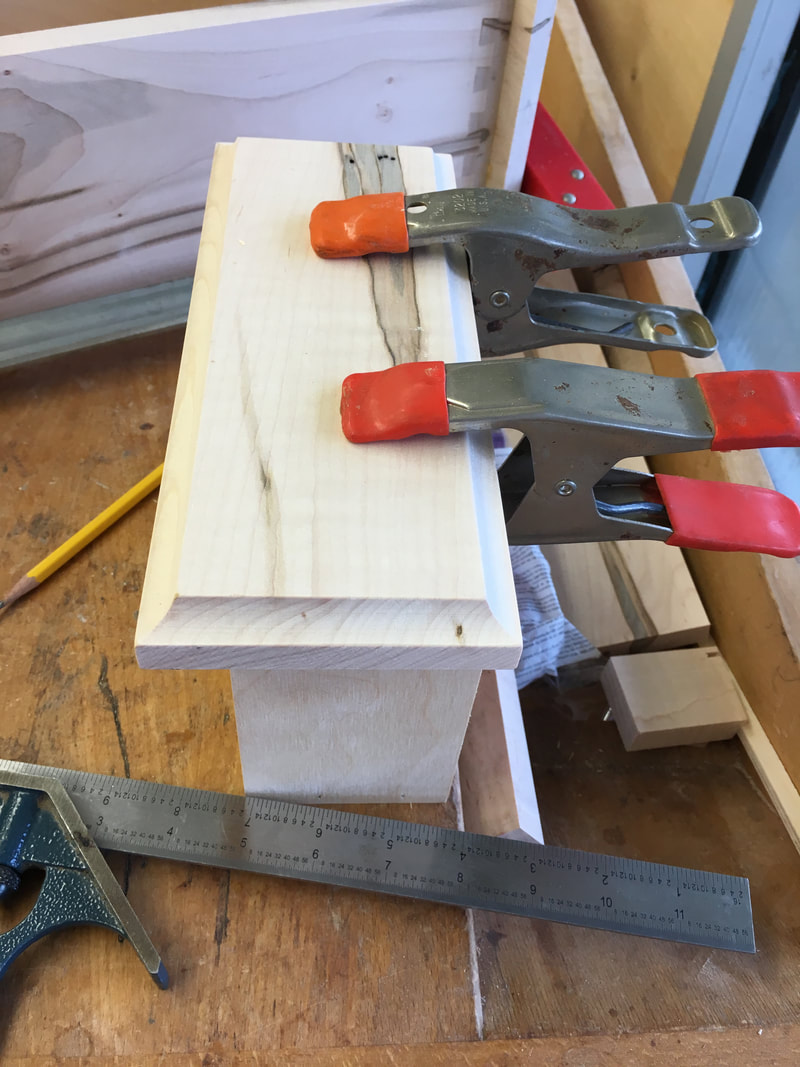
Time to add some character to a few pieces… as in cut some profiles using the router table. I did not ask which router bit we used, I should have (does cove sound right?). We cut profiles in the top & bottom pieces that we first cut (3 sides, not the back), all 4 sides of the false drawer front, and the front edge of the shelf trim.
We are making a raised panel door for this cabinet. If you make your doors just a little bit to wide/tall, that can be fixed with a hand planer or jointer, even a sander. If you make them too small…measure twice, cut once. It is made of rails and stiles, and a panel, all made from our ¾” Ambrosia Maple. The stiles and rails are 1 ½” wide. The vertical stiles need to be about 1/16” short of the height the box so the door can open/close smoothly (there is a shelf and a top that create overhangs). I cut mine just under 16” (measure your gap from shelf to top). The rails need to be the width of the box, minus 3 inches for the width of the stiles, plus 13/16” to join into the slots of the stiles. Cutting the joinery for these requires 2 router bits. The rails go first to cut their ends to fit in the joinery slot. Then the stiles and rails go through a different bit. The second bit also creates the slot for the panel. The panel has its own router bit (find the profile you like). Sometimes the 3 bits for a panel door are sold together. First we need to cut the panel to size (joint one edge, rip to width, joint that edge, cross cut to get 90 edge, cross cut to length). We are using “space balls” in our panel slot to reduce rattle and helps panel stay centered. You put a couple in each slot. They are 5/32” thick, so we need to account for the thickness of two in our dimensions, 10/32” or 5/16”. So it is not too tight, we worked with 6/16” There is a piece of the rail that touches the panel slot, so measure that and subtract 6/16” . I don’t remember where I measured the stile from/to, but i accounted for the 6/16” of the space balls. Now that you have it cut to size, it is time to profile it. You have to make several passes on the router table as you are cutting ¾” down to ¼”. Make the last few passes thin and test fit in your slot. You do not want it too loose. Put glue on the ends of the rails, put them in to one stile, leaving one rail a little bit “wide” (not flush). Slide panel in, attach other stile, make them all flush. Clamp them while the glue dries.
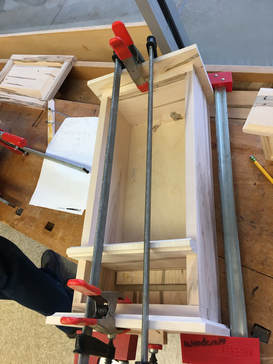
I think this is the time we glued the trim piece on the shelf. Obviously that can be done anytime. We also need to glue the decorative top & bottom on to the carcass. How many clamps do you have???
For the top & bottom , I used a combination square to measure overhang on the left and right to make sure it was equal. The ruler in the square can slide and lock in place, so it is easy to measure length of one side , then take to other side to see if the gap is the same, no reading necessary.
Almost done. Make a drawer. Remember it should be a little loose in the slot, 1/16” short is a good target. Also, the drawer does not HAVE to go all the way to the back wall. This one has a false front that will sit flush on the surface of the cabinet. If the drawer is too deep, that will stick out. We had some drawer panel material that already had a slot in it. We cut it to the depth of the opening by sticking it in the opening and drawing a line, I cut mine just a little short of this. Then we put those 2 side pieces in the opening and measured the “new” opening to cut the width of the drawer and cut that a little short. We used a brad nailer (small nail gun) to join the drawer pieces. We were given a small ¼” panel for the drawer bottom and needed to cut it to size. The size is the dimensions of the drawer PLUS 14/32” to account for the slots (two slots just under ¼” each). Glue the false front onto the drawer.
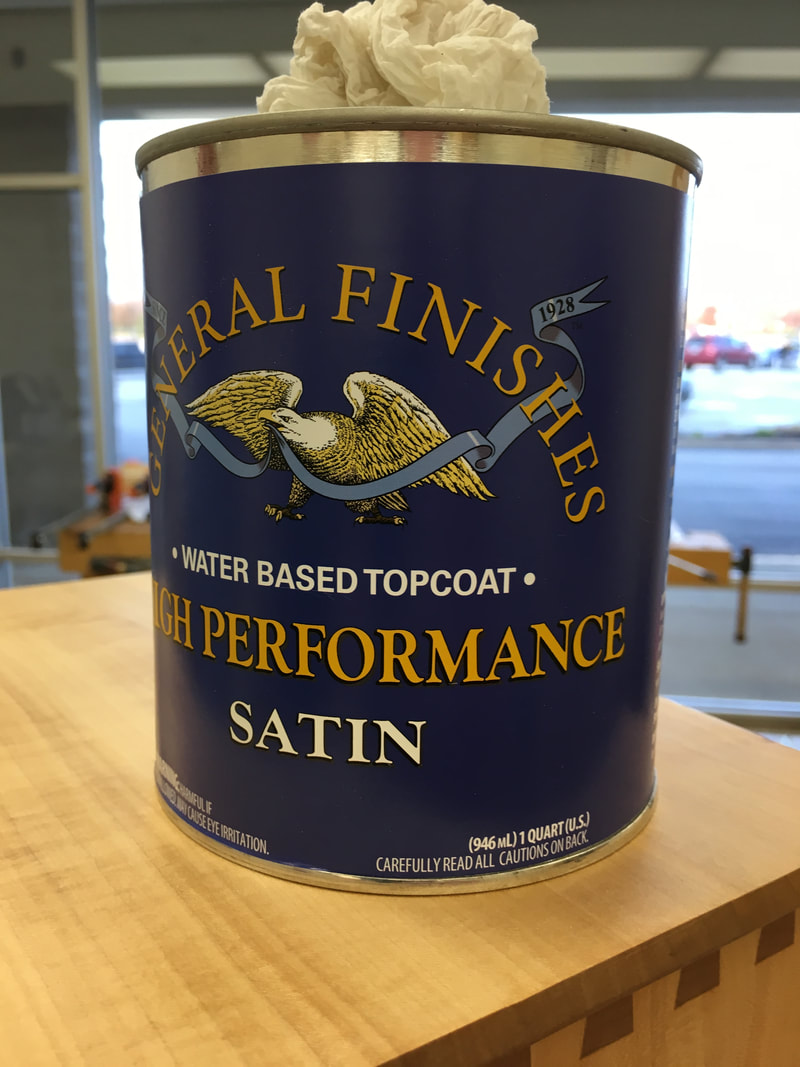
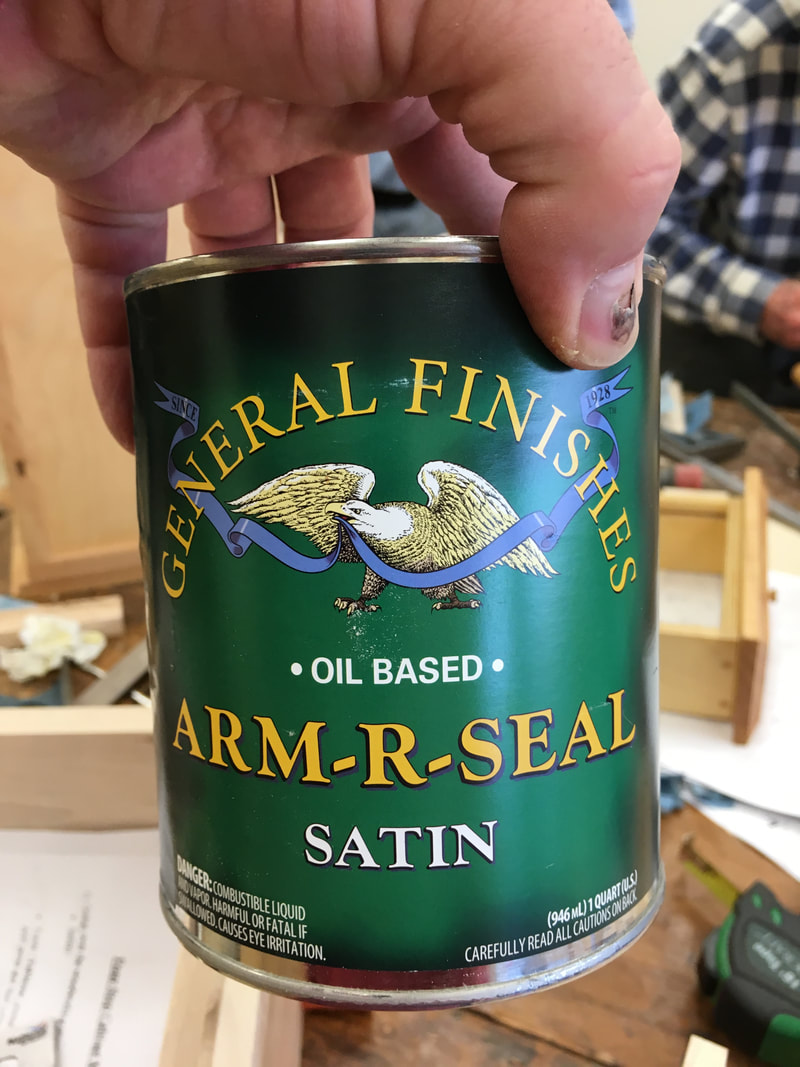
There are still a few things to do to complete the cabinet. It needs a good finish sanding. The door needs attached. A finish needs to be applied. Some people will use a water based topcoat, some will use an oil based clear coat. Some people will paint, some will stain (then apply a protective top coat). I am leaning towards the water based topcoat. This wood has some real nice character, so a clear coat of some kind makes sense.
One of the hard things to learn is “what can you fix”. You know you are going to make mistakes, too short, too long. Which ones can be fixed easily? My false drawer front was actually a little to big. It wouldn’t close between the decorative bottom and the shelf. That is an easy fix. Use a hand planer and plane the top & bottom of the face, test fit, plane some more… until it fits. The same is true for doors that are a little large.
There are many tools involved in this. Many I do not have and do not see myself buying. A class like this does show you how to use all those tools. And how expensive a hobby this can be. But the right tool makes things easier and nicer. Learning new methods and tools makes you want to find a cooperative workshop / #MakerSpace where people share these tools and their expertise. It was a good class and I learned a bunch, and already forgot some of it.
0 Comments
Your comment will be posted after it is approved.
Leave a Reply. |
Archives
December 2022
Categories |
 RSS Feed