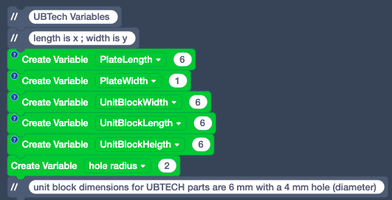
 Do you have a 3D printer? Do you have a laser cutter? Do you want to create some of your own robotics/STEM building parts (think LEGO or VEX) Stemfie 3D has files available to download (https://stemfie.org/ ; https://twitter.com/Stemfie3D ). But maybe you want something else. They also created a Tinkercad Codeblock file to design some parts https://www.tinkercad.com/codeblocks/hM2Wx2UNpqC-stemfie-tinkercad-beammaker-codeblock - and that is a file that I have adjusted. It is based on a "Unit Block" that is repeated. With variable inputs, you can design for any brand of part (they all have different dimensions), or make your own "brand". Here is a link to my Codeblocks : https://www.tinkercad.com/codeblocks/blIIY6otoUc-diybuildingblockroundedcorners First we need some inputs. length (x direction) and width (y direction) of what you want to build as well as dimensions for the unit block and the hole. Remember , that is the RADIUS of the hole. Height (z direction) only matters if you are going to 3D print. If you are going to laser cut, this goes away in the SVG export. Next , we create the unit block. Codeblocks puts an initial object centered around the origin, which is why everything has to move half of any dimension (divide by 2). I created the variable "offset" so I could multiply it by negative 1 to move the block "backwards" (now i am seeing i probably could have divided by negative 2) ; I want to back it up so that when I start copying it, the copies will start at the origin. We also move it up in z direction to get on the build plate (not below) for 3D printing. 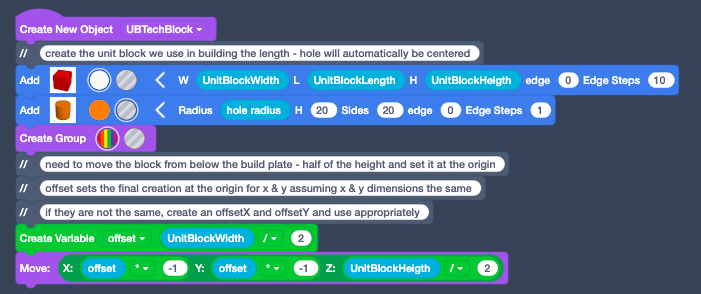 Now we will build out the length (x direction) of our object. Copies copy directly over top of the original object, so we have to move them in the x direction so they are adjacent to each other. But each subsequent one has to move further, which is why “math” & variables are so nice. We still have the original block, and we could have left it….but that would have meant our shape was 1 bigger than we asked for / or we would have to ask for 1 less than we wanted in the beginning… just confusing. So we delete it. Remember to Group things. 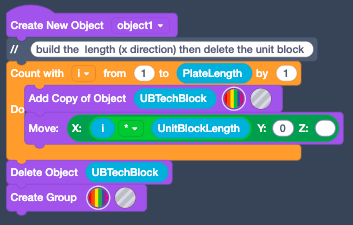 So, that got you a bar. If you want a plate, we need to build in the y direction. Same type of loop code, just utilizing the y variables. 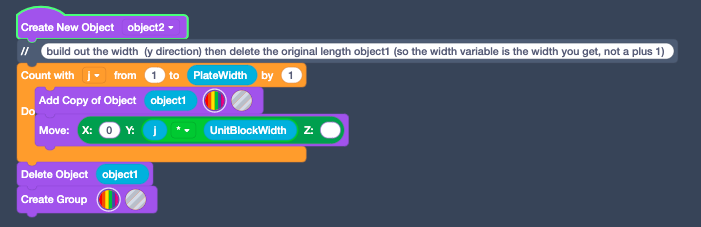 Some people like rounded corners. I have more code that is not so elegant to round off the corners... it starts with a cube, add a cylinder hole, use some cube holes to get rid of the rest of the original cube, leaving only 1 corner , group and scale up just a touch (to make sure it extends beyond the edges of the part). I created 1 roundoff hole. Then copied it 4 times, 1 for each corner. If you can think of a better way to get rounded corners, please let me know. I tried the code with about 12 variations of inputs and they all worked. 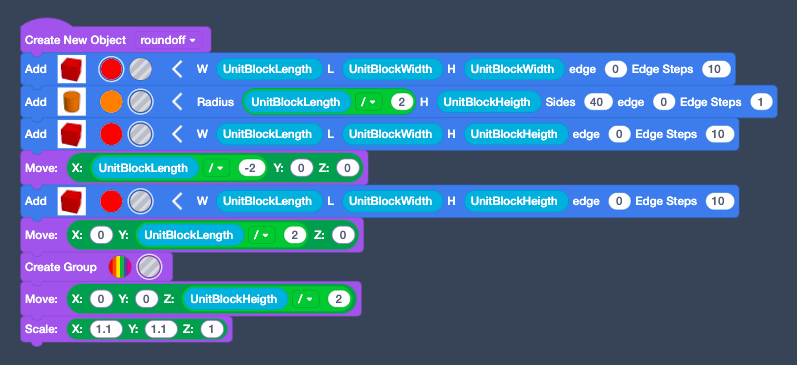 Now we have to copy and position (rotate & move) that roundoff at the 4 corners... 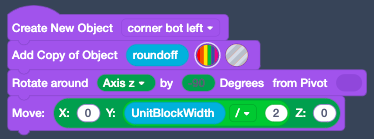  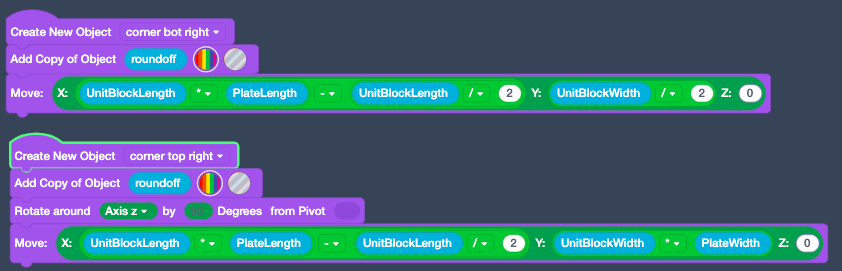 Time to merge (group) all of the shapes. Delete all the original shapes, leaving the finished one for export. 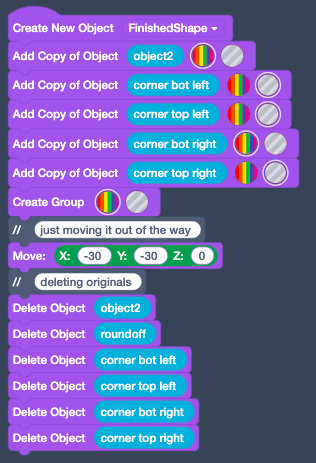 i forgot to include a finished example...here is an 8x4 part with rounded corners 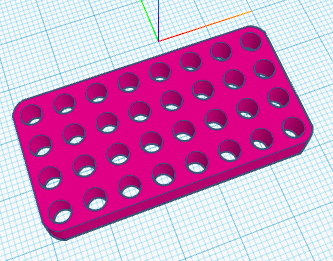
0 Comments
Your comment will be posted after it is approved.
Leave a Reply. |
Archives
December 2022
Categories |
 RSS Feed