Makerbit
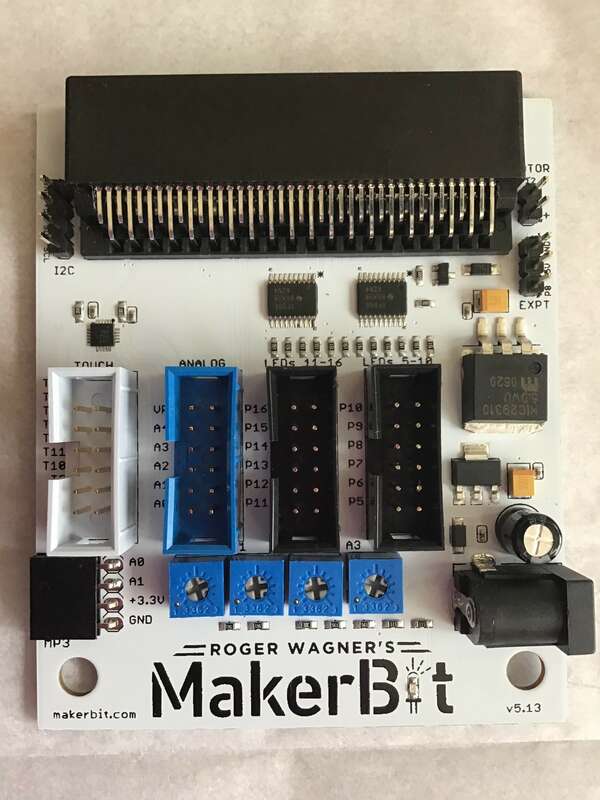
There are two versions, the original Makerbit (left picture) and the Makerbit+R. The original is designed more for poster board type presentations. Through its Makerbit Media Linker app (chrome extension), it can control video and audio files on your computer as well as the ports on the board. It has 12 touchpoints (white box) that can control 12 LED's (black boxes ; P5-16), 5 analog inputs (blue box ; A0-4), as well as 1 IIC device (top left pins) 1 motor (top right pins) and 1 servo (3 pins under the motor pins). It can be powered through the barrel jack (bottom right) which can handle from 3-12 V. It will only send 3 V to power the micro:bit, which plugs in at the top.
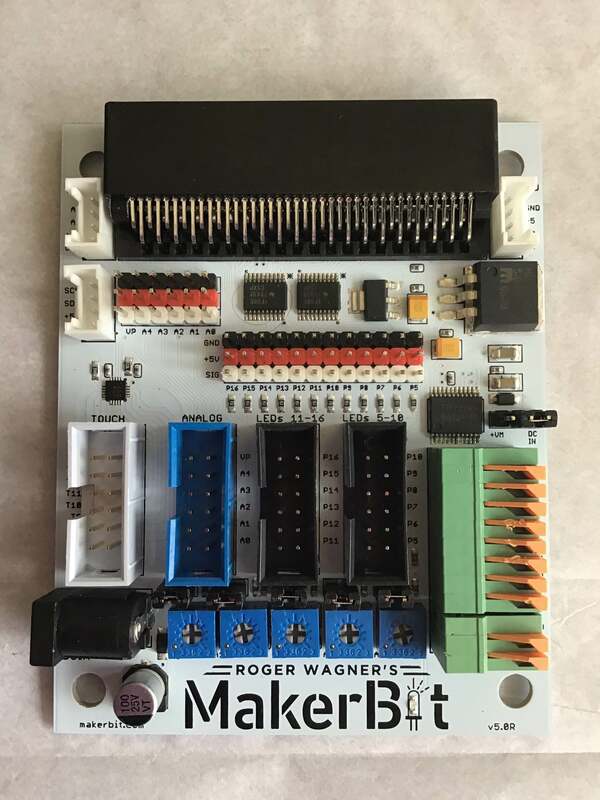
I did not work with the original device. I worked with the +R, which is for robotics (right picture). It adds more features like the motor controller on the right bottom (green) as well as the grove ports (small white), which are easy connections for sensors. Also, 17 of the micro:bit pins (A0-A4, P5-P16) are broken out to a 3 prong setup (the black, red, white in the middle of the board) for inputs (sensors) or outputs (sound, neopixels, servo ). The first thing you have to understand is that this is duplicating the access of the pins. They are in the standard ribbon cable boxes to easily use a chunk of them at once and on the three prong to more easily use individually as well as have power (red) and ground (black) next to each. So, P16 is now in two places. It is the last set of pins in the black ribbon cable box and also the left end of the triple pin block in the middle of the board. Actually, some pins are in 3 places, but conflicts should be easy to avoid if you aren't trying to use all 17 input/outputs. Specifically, in addition to the ribbon cable boxes and 3 prong setup, A0 & A1 are in the top left grove connector, P5 & P8 in the top right grove, and the motor controller use P11-16.
I did not work with the original device. I worked with the +R, which is for robotics (right picture). It adds more features like the motor controller on the right bottom (green) as well as the grove ports (small white), which are easy connections for sensors. Also, 17 of the micro:bit pins (A0-A4, P5-P16) are broken out to a 3 prong setup (the black, red, white in the middle of the board) for inputs (sensors) or outputs (sound, neopixels, servo ). The first thing you have to understand is that this is duplicating the access of the pins. They are in the standard ribbon cable boxes to easily use a chunk of them at once and on the three prong to more easily use individually as well as have power (red) and ground (black) next to each. So, P16 is now in two places. It is the last set of pins in the black ribbon cable box and also the left end of the triple pin block in the middle of the board. Actually, some pins are in 3 places, but conflicts should be easy to avoid if you aren't trying to use all 17 input/outputs. Specifically, in addition to the ribbon cable boxes and 3 prong setup, A0 & A1 are in the top left grove connector, P5 & P8 in the top right grove, and the motor controller use P11-16.
|
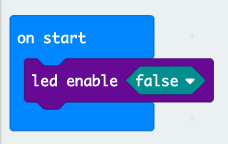
You also have to be aware that the micro:bit itself has conflicts built in. P3, 4, 6, 7, 9, 10 (A3, A4, P6, P7, P9, P10 for Makerbit) are part of the 5x5 LED array and P5 is button A , P11 is button B. If you want the 5x5 and two buttons, you cannot use those pins. I don't really like the 5x5 array (reading a word/number 1 character at a time) and the Makerbit has 12 touch points available, so i disable those functions. In the "Led" block of the makecode editor there is a block "led enable" that I set "false".
|

|
I like the Makerbit+R. It gives you easy (and multiple) access to the pins, with maximum flexibility on how to use them. It sends 5V power to some pins to easily run devices like servos, neopixels and LCD screens and a distance sensor. Some people might find other boards easier because they have specific places to plug certain devices (plug the servos in here and here) as opposed to "plug it in any of 17 places, but keep in mind conflicts". There is a great deal of documentation for the Makerbit, resources and tutorials. But I think we need to work on a set of "getting started" cards. Show some of the basics to get people going.
I have done some videos of these "getting started" ideas. Alas, I am not a designer yet, and dont know how to use Illustraor or Indesign or similar, to make some nice cards. Below is the first video in the playlist.
I have done some videos of these "getting started" ideas. Alas, I am not a designer yet, and dont know how to use Illustraor or Indesign or similar, to make some nice cards. Below is the first video in the playlist.