|
Recently I attended two education events in the area. One was the two day #NEOTech2019 (March 6 & 7) at the Cleveland Convention Center put on by NEOnet. The other was NEOSS, a one day meeting of Northeast Ohio Science Specialists sponsored by the Educational Service Center of Northeast Ohio (ESCNEO) (March 13). Two things common to both events that are important to me : 1) people have a ton of questions about MakerSpace and Maker Centered Learning 2) schools are all over the place in implementing them. Obviously people need/want help. How do we help them? One size does NOT fit all ; every school is in a different situation, every group of kids is different, every teacher is different. Some have admin support, some do not. Some have community money, some have no money. Space/no space. Storage/no storage… As with all things K12 there is a WIDE range of ideas and things to consider. And Maker in and of itself is such a range of mediums, materials, and practices. So I don’t think whole group PD is really the best answer. Do people coming to MakerSpaces truly see the benefit of Maker Centered Learning or are they “jumping on the bandwagon” ? Does that matter? If they don’t see the benefit, will they “faithfully” integrate? If they aren’t already doing projects (PBL) can they do maker? If they are still test focused for their assessments will Maker change anything? The true implementation is with the Maker aspect at the focal point and the curriculum swirling around the periphery, completely opposite to what many do. One teacher asked for maker integrated, standards aligned lessons/curriculum. I don’t think we can give them that, since everything/everybody is different. Again, there are so many ways to be a #Maker, I can’t tell you or your students what kind of maker to be. We don’t want cookie cutter classes. Could we even put together a library of ideas? How detailed would/could they be? Some people have laser cutters, others have scissors?? Where could we even put such a library for all to access? I am beginning to think the best way to move Maker Education forward is 1 on 1 (or 2) help. Not talking to a whole school or even whole department. Let us sit down, you take me through some standards and tell me what resources you currently have and I will give you some ideas. I think we have to first focus on the people that have an inkling “this is a good thing” and “I can find my inner maker”. Crazy thought, individualized education. Maybe we could have group sessions on finding your inner maker (we are all born makers). That has to come out if teachers are going to help students be the maker / innovator they can be. But you have to have many materials available. Everyone has a different medium of choice. Creativity sessions. This leads me to the answer of “how do I start a MakerSpace if I have nothing?” You have you. You have your inner maker, something that piques your interest and creativity. Bring that to the students and share it with them. Whatever the medium is : quilting, cooking, coding, puzzles, rockets, music, doodling… and bring some extra materials because it will resonate with a few students and you give them their creative outlet. Then you talk to the kids peeking in and ask what they would like to try their hand at, and figure out a way to do that. Maybe find a “mentor” teacher for that second thing (assuming it is not a medium that interests you). Maybe a community member is an expert, or hobbyist. We find time, space and money for what we appreciate and value. What do you think are the ways to get #MakerCenteredLearning more integrated into schools?? Overview of the 2 events : Unfortunately, I missed the NEOTech opening keynote by Mike Daugherty because there was a weather issue early in the morning and a 45 min trip took almost 2 hours. I wasn’t the only late arrival. I gained some photo editing tips from Eric Curts, he shared some online tools to help remove the background from images (RemoveBG , Online Photo Scissors , Lunapic , and PhotoPea ) . They are in order of simple to complex. Dave Binkley gave examples of how he has incorporated choice and mastery in his classes. Connie Fasig gave us a good description of what coding is, walked us through an “unplugged” coding example and describe code.org a bit. There was an Edcamp style session about MakerSpaces. My day ended with Vicki Turner taking us through some creativity ideas for ourselves, to bring out or express our own creativity so we can better help students with theirs. On day two there were a few STEM sessions, a session where Sheila King described helping a school do after school robotics, and finally I got to here Michael Daugherty, this time share some tools that he has “borrowed” from his network. The ones I found most interesting were the slide templates from slidescarnival.com and nuzzel.com to consolidate some of the info on Twitter.  The Science Specialist meeting had a #Maker #MakerSpace focus to it. Barb Curry from Cuyahoga Heights took us through some maker activities with designing an airblown car, blades for a wind turbine, Sphero mini golf. Barb also had 2 3D printers going for people to see. Ainsley and Ray from Case Western Reserve Thinkbox walked us through what they have in their space and how it is being used (open to community) and gave us ideas on planning our own. Andrew from Beauty and the Bolt talked to us about how they are helping stem education with their non-profit with project libraries, kits, equipment rental, and consulting services. They are a recently formed non-profit. Sherry from the ASM Materials Education Foundation talked to us about educator and student camps coming up.
0 Comments
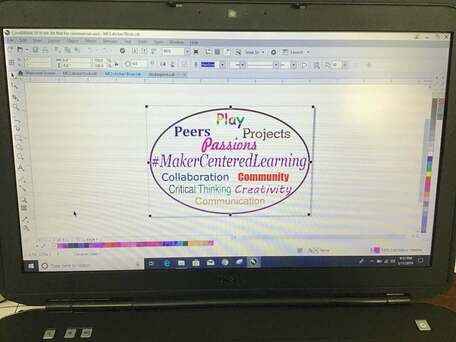
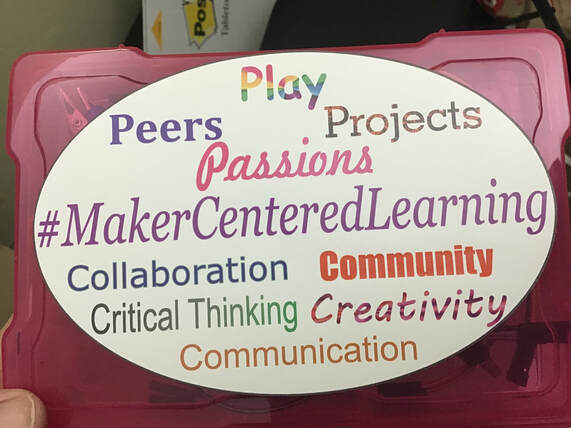
The main branch of the Akron Public Library has a TechZone with some #Maker equipment (3D printers, laser engraver, vinyl printer, heat press, curio, sewing machine, green screen, recording rooms, green screen, button maker). They have a 1 ½ hour session every Monday, Maker Mondays, taking people through how to use one of the machines. I designed a sticker for #MakerCenteredLearning in Corel Draw and wanted to print a few, so I went down for the vinyl printer/cutter session to learn some more and stayed afterwards to print a few (12). They have a Roland VersaCAMM VS-300i printer/cutter. It is a 30” wide machine , but it can only print 28” wide because of the rollers at the edges to move the material (so make your document 28" tall). The cost is $2 per linear foot (+$1 for the material that comes before and after the print). They say it takes about 2-3 mins per foot to print. They have free grommets if you need them for your banner. They have a variety of materials : banner matte, banner gloss, paper gloss, paper satin, clear static cling, white static cling, permanent sticker, removable sticker. You have to call or go in to make an appointment to use the machine. Sometimes they are booked two or three weeks out. They are very good about helping you make sure the design is ready to print and helping you print. They have three design computers with Corel Draw version X7, as well as the Adobe software suite.
I learned a few other things. The important one was that I needed to export my file as an .eps because I wanted a kiss cut for the stickers that was not square or rectangle. The other file formats to use are .pdf or .jpg. With those, the software can tell the machine to kiss cut the shape of the image if it is square or rectangle. Another thing is that VersaWorks software can place duplicates of your file on the document, if you want more than one of a design. It will default to 0.15” between copies. I had done my own copy & paste and created a large document with 12 stickers. A feature of Corel that might be useful is the trace function, where you could ask the software to trace around your shape, say a large block letter, and make that the kiss cut. Remember, to get the software to recognize kiss cut the line needs to be “hairline” and the color should be the special magenta, and of course export as .eps. They also mentioned using Adobe Illustrator , Microsoft Publisher, or even Canva to create your design, but to export as .pdf or .jpg to bring into VersaWorks. I printed 12, 4"x6" stickers for $3. |
Archives
December 2022
Categories |


 RSS Feed