|
If you have a laser cutter, you can create with thicker cardboard (single corrugated) , wood, or acrylic. There are several design softwares like Adobe Illustrator, Corel Draw, Inkscape, Lightburn. Possibly your laser has its own design software. I assume they are pretty similar with these basics (box, line segment, positioning objects, text, import svg). I have Lightburn and Corel Draw software, but I dont have a laser to test this out with. In Lightburn (and Corel Draw) it is easy to toggle between millimeter and inches in the top menu bar. Yes, it is in millimeter, NOT centimeter.   I made a 110 mm x 40 mm box so that I can make a 10 cm x 4 cm ruler. Place it anywhere on the grid but be specific because that is how you will place tick marks.  You need to figure out where the software is positioning things… from the center or bottom. This is usually easily adjust...look on the menu bar for something like below. These are both saying "top left"   I made a 15 mm long line and placed it 5 mm inside the left edge of the box, and vertically so that it goes to the top edge. (you could work bottom edge)  Change the color of the line. In Lightburn, laser settings are organized by line color. Since I want these to be burned and the box to be cut, they need to be different settings/colors. Some softwares have red hairline as a cut line and blacks as etch. You have to experiment to get the correct settings for your laser and material. 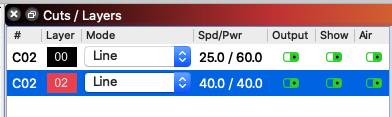 Now I copy and paste this line, moving it 10 mm over every time until I have 11 in my box. I want my first tick mark to be “0”. I am only putting tick marks every centimeter. You can easily create half centimeter lines or even millimeter lines. This is a great discussion to have with students...what and how many lines do you need? 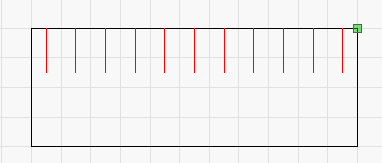 If you want thicker lines, the way that I have seen is to use the “Offset Shapes” tool. Maybe you want to change thickness for different measurements...thick for centimeter, thin for ½ centimeter. I have not explored this yet, so I do not know what that will do for placement. If you offset a line with it be centered where you place it or off by the amount (say 1 mm) that you pick. Add some numbers. Pick a font and font size. A consideration for text is whether you want it just outlined or filled, or both. If you want it different than Line, you need to make it a different color than the tick marks and adjust settings. 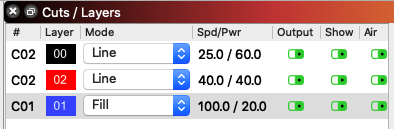  For some reason I am staggering the numbers...easier to read??? What will you do with double digit numbers? I made the 10 smaller so it fit better. Now we want to personalize with an image or logo or initials… Import an image file. I have an svg of a seahorse that I got from flaticon.com . Do you want it outlined or filled? Choose the color for the right settings. If you import a png, it only comes in as image, so there are no choices for Fill or Line, though you can adjust the speed and power settings 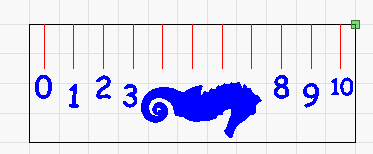 Now you are ready to cut it on your laser. Obviously it might take a couple of tries to get the look you want. One trick some people use with etching is to put masking tape where they are burning/etching. Sometimes it gives a cleaner look. As always, have a standard that you made, for the students to compare their rulers to. Corel Draw is similar, as I assume all vector design software will be. Make a rectangle the size you want. Place it where you want it (is location based on the center or a corner??). Make a short vertical segment the size you want for your tick mark and use the position boxes to place it where needed. Copy & paste then position. Add some text for numbers  I brought in an svg image by using “File” “Place” then adjusted the image (size & location) 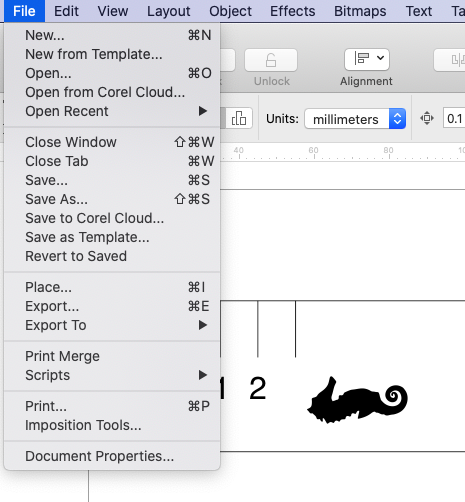 How will you go from Corel draw to your laser?
--------------------------------------------------------------------------------------------------------- I have to investigate if you just want to print from these softwares to paper...the sizing was NOT coming out correctly
0 Comments
Your comment will be posted after it is approved.
Leave a Reply. |
Archives
December 2022
Categories |
 RSS Feed